I recently found a rare 80’s technology gem on the attic: An (almost) functional Commodore 1520 plotter. This was the only plotter ever sold by Commodore. It was a C64 peripheral, although even back then, it was pretty unknown (and fairly useless).

Surprisingly, after 25 years of deep sleep, the device powered up to self test. Two motor gears needed some glue and the ink in the pens had dried. A bit of water brought at least the blue pen back to life (the plotter has four pens in different colors, for a “perfect multimedia experience”).

Commodore, like just about everyone else back then, used a propietary protocol to drive the plotter. It is a weird serial protocol – in our official Everykey protocol weirdness scale, it beats most other protocols by far, making I2C and SPI look boring and straightforward. There’s even some (partially incorrect) documentation on the web. And you can still buy the 6-pin DIN plugs. There are some projects to control the Commodore 1541 floppy disk drive, but we didn’t find any good approaches on bringing the 1520 back to life. Challenge accepted!

The implementation was surprisingly simple – after categorizing the existing documentation into a) usable,  b) incomplete or c) just plain wrong. The Everykey connects through USB to a computer and shows up as a virtual serial port. It implements a tiny parser which interprets simple commands (such as MOVE, LINE, PRINT or COLOR) typed into the terminal and translates them into something that can be understood by the plotter. Here’s an early result (just blue – as mentioned, the other pens are still dry):

Commodore 1520 plotter
A Commodore 1520 plotter controlled by Everykey

The output quality is not perfect (for example, you can see that the vertical feed is off a little), cleaning the mechanics and replacing the pens should help. Even in perfect condition, the results could not compete even with the cheapest inkjet printer of today. So why did we do it? Because we can.

Code and schematics are not online yet since we decided to stop spamming our base repository. If you’re interested in how it works, let me know. If you have other peripherals waiting for resurrection, we might be able to help – did you know that we are for hire for this sort of stuff?

There’s a video of the plotter in action on youtube.

Everykey goes International!

We’re currently planing to hold an SMD Soldering workshop during which you will build your own Everykey in The Netherlands at the hack42 in Arnhem. Apart from assembling an Everykey, we’ll discuss the entire design so you’ll learn what all the parts is good for and will provide a quick introduction to programming the device with our SDK . You can read a description of a previous workshop here in case you are interested and would like to learn more. We’ll be able to stick around all day, so we can go into more details than normally and hack a bit more.

If you are interested: the workshop will take place at the beginning of next year and we are currently trying to find a suitable date, you can help by filling out preferences:

http://doodle.com/zpupmndagvnmigxu?

Participation in the workshop will be around €35 (we’ll split our travel expenses among all the participants + €25 for parts and materials)

The workshop will be help in English (though we can answer questions in German and pretend Dutch!)

More info.

USB is a rather complex protocol. Its main advantage in computer history was that it promised to offer a useful replacement for legacy parallel and serial ports. In comparison though, USB is terribly complex, but it does not suffer the typical shortcomings of its predecessors and has some nice, built-in advantages: Hot plugging, device self description, automatic driver matching etc.

Keeping that in mind, it’s a bit surprising that the number-one mode of communication in embedded DIY projects that support USB is – a virtual serial port. This approach combines the complexity of USB with the inflexibility of serial ports. The worst of both worlds!

For certain purposes, serial ports are nice: Quick and dirty communication, debugging etc. So we’re happy to announce that our USB software stack now includes a virtual serial port implementation (USB CDC class, Abstract Control Model) – if you’re curious to see one of the weirdest USB class specifications, have a look at the USB CDC specification at USB.org.

To see it in action, compile and install the cdcleetifier example. Then replug your device. On Macs and Linux systems, it should appear as a serial device in the /dev subdirectory. Connect it to a serial terminal to see the old serial glory of the eighties (on a Mac, you may use “screen /dev/cu.usbserialV1.1” – quit with “ctrl-a k y”). Type some text – the example will turn your text into V3RY C00L l33TSP3AK on the fly.

We haven’t tested it on Windows yet, but it seems to require an additional (quite useless) configuration (*.inf ?) file that basically states that this serial device is a serial device (if someone manages to get it running, we would be happy to hear from you).

Posted in USB.

We’re very excited about our new toy here at Everykey World Headquarters. We ordered an el-cheapo brand CNC router that we’re hoping to use to make cases for the Everykey and PCBs for new prototypes. While buying cheap hardware in China has some advantages (such as apparently including an AutoCAD license for free on the CD…), there are some drawbacks to consider:

  • You’re obviously not going to be sure of the quality you’ll be getting. One generally prefers a solid and stable machine  milling parts in sub-millimeter accuracy. So far, we’re impressed by the mechanical robustness. Everthing seems robust and was layed out quite “pragmatically” which served well to make the machine hackable. The included spindle, while usable, was the only part that we’ve had any concerns about mechanical quality – there’s too much backlash for accurate, even surfaces (however, results are still much better than 3D prints). Fortunately, the spindle turns out to be a Foredom H.30 handpiece ripoff with US standard flex shaft attachment, so it should be fairly simple to replace.
  • The “english language” manual starts off with this reassuring gem: “Responding to be installed in the gas containing the explosive environment, otherwise have caused the explosive danger”
  • The CNC  controller only has a parallel port and we don’t have any computers from before 2000 laying around that have a suitable connection.

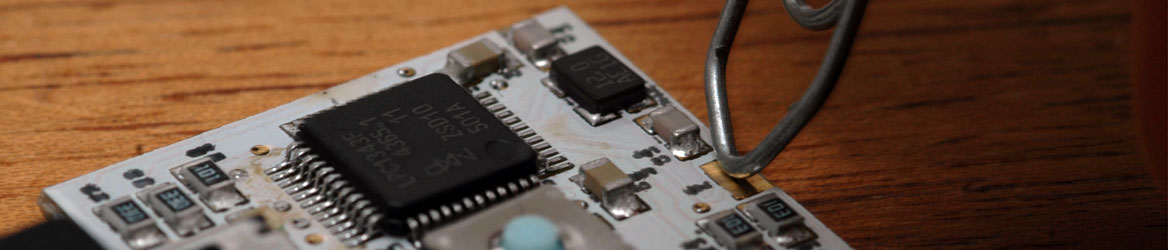
Opening the controller box reveals its quite shocking circuitry: It mainly consists of one Allegro A3977-based stepper driver board per axis, properly done with insulated inputs via optocouplers. That’s the good news (the A3977 is a very nice chip and optocouplers are a good thing to have if you’re going from logic levels to higher power domains). The bad news is that there’s another board between the parallel port and the stepper drivers, containing a line driver. It’s probably there to boost (some of) the parallel port signals to a level that can reliably drive the optocouplers. Unfortunately, this board is powered by the controller, nullifying the galvanic insulation and therefore rendering the optocouplers quite useless. We’ll address that later – for now, we will use it as is, very carefully.

Off-the-shelf USB-to-Parallel adapters don’t work for controlling CNC mills: The parallel port pins send step signals directly to the stepper controllers. For usable speeds, you need precisely timed signals with 10 KHz or more. That’s too much for ordinary converters because of the fixed 1 KHz framing of USB (these high frequencies are even a challenge for PCs, so CNC CAM applications usually need to use tricks to make it work, i.e. make use of low level timers for driving the parallel port).

Hence, in order to talk to our CNC mill, we had to do something. Fortunately, we had some Everykeys and line drivers laying around to solve that problem (the purpose of the 74HCT244  line drivers is to shift the voltage levels from our 3.3V to 5V found at parallel ports). We have two options: a) Talk directly to the stepper driver boards or b) talk to the parallel port. For now, we decided to take the second option as it would also work for other CNC machines without modification, despite the “interesting” circuit mentioned above. Later on, we might replace that part with our solution to provide both USB connectivity and electrical safety (our line drivers can deliver enough current for the optocouplers, so the board is not needed any longer). This will also enable us to make use of the fourth axis which came with the machine: There are four stepper drivers, but the fourth axis is controlled by parallel port pins that cannot be driven easily by PCs.

The host does not control the steppers directly, but sends higher level motion commands to the Everykey, which takes care of stepper controlling and reporting the CNC mill state back to the host. Right now, we’re running at 20KHz, but there seems to be plenty of headroom for more.

Parallel Port Adapter

Within a week, we were self-hosting. Here’s a picture of the elegant casing we made for our USB to Parallel Port adapter:

Casing for parallel port controller

… as well as some shiny, acrylic glass Everycases:

Everykey in Anycase

Currently, we’re controlling the device via USB HID, which is working out quite nicely. We’re still using a roll-your-own scripting language, but are hoping to be able to import G-Code soon at the very least.

For the truely painless, there’s some code available for perusal in a secret hidden branch under the `examples` directory of the SDK. The host side of the project is still in such a pre-alpha stage that even we’re ashamed to release it. We’re working on controller software in Objective-C/Cocoa and node.js, fairly obvious plattform choices for interfacing to hardware 🙂

So we’ve been busy these last couple of days. Apart from our new toy (more on our progress with our CNC router soon!) we’ve hosted two workshops last weekend, totaling 16 Everykeys built. First workshop was on Saturday at the Elisabeth-von-Thüringen-Gymnasium in Cologne. It was incredibly fun to work together with a group of highly motivated young adults and we’re very anxious to find out what sort of things they’ll be building with the keys….

Workshop Elisabeth-von-Thüringen-Gymnasium 2012-10-13

The second workshop was a public workshop at the Dingfabrik in Cologne:

Dingfabrik Workshop 2012-10-14

unfortunately in a way, there was such high demand for the workshop that we couldn’t fit everybody in. More people ended up showing that had registered and it was quite a tight fit with 10 participants. Because of the waiting list, we’ll definitely be holding more workshops, including not just  “solder your own” events, but also some more in depth programming workshops in which we’ll delve deeper into embedded programming. Send us a quick mail (info@everykey.de) in case you’d like to be informed about future workshops, know of a good venue within a reasonable distance from Cologne or would like a “private” session at your school or company or just want to chat.

Thanks very much to all the great participants and the feedback you’ve provided!

Cheapo CNC

It’s like Christmas in October at Everykey world headquarters! We received our modestly priced chinese CNC router yesterday, packed in an awesome wooden crate. It’s moderately priced because it only has a parallel port connection, but we’ll be changing that. Basically the entire controller mechanism consists of four Allegro A3977 Stepper Driver boards which we can control directly from the Everykey…

Oscilloscopes can be very useful. The main problem with oscilloscopes is that many hardware hackers don’t have one – due to a lack of money, space or both. If you want to look at real time signals, you have to improvise. So do I.

If you’re lucky, you can slow down signals to brain speed. Still, looking at them with a multimeter is no fun. Here’s a simple level tester I built using a 1K resistor, a LED (in fact, it’s a deluxe two-pin dual-color LED, so you can even see negative polarity), a piece of wire, an alligator clip and some heat shrink tube – you can see the resistor beneath the tube, the probe is acually one side of the resistor. Just cents of materials, and minutes to build. Of course, it’s pretty dumb by no means accurate, but it can be useful – LED green: High, LED off: Low, LED very dim green: Likely undriven with a pullup somewhere, LED red: Whoops, negative voltage.

This little tool helped me debugging the SPI firmware: The peripheral simply didn’t answer. I turned down the interface speed to a crawl and observed the different signal lines: Chip select was ok and on the MOSI line I could see each bit of my commands, great. But there was no clock. It boiled down to an error in the LPC1343 user manual (the only one I ever saw, and it’s corrected in the latest revision – make sure you have it). However, without this tool, I would never have searched for the culprit there. Did I mention SPI works now?

We’re offering an Build-Your-Own-And-Learn-How-It-Works workshop for the Everykey on Sunday October 14. 2012 at the Dingfabrik in Cologne!

In this workshop we’ll solder an Everykey development kit.

The Everykey board is a tiny prototyping and development board. It can be used to build USB peripherals, standalone applications or to simply have fun with a powerful embeded controller. SMD soldering seems challenging at first: the components are tiny! In this workshop we’ll show you it’s nowhere as difficult as you might think. Being able to solder SMD opens a whole new world of components to you that just aren’t available in the old, through-hole world, from more powerful microprocessors to mems gyrosensors.

While we’re soldering we’ll explain the functionality of all the parts in detail, you won’t be just be putting together a puzzle, but gain a full understanding of how the circuit works.

The board features a powerful 32-Bit, 72 MHz ARM Cortex M3 microcontroller, a full-speed USB port, a LED, a button and solder points for most of the processor’s pins. The design of the board and the SDK we’re developing is completely open source. Once it’s assembled it’s just as easy to work with as Arduino, just much more powerful.

Click here for Registration!

Expected Length: roughly 4 hours (open end)
Cost: €25, includes kit and all materials
No previous experience required
Tools: we’ll provide all necessary tools and equipment

People with glasses should bring a magnifying device compatible with their eyewear!

Location:
Dingfabrik Köln e.V.
Deutz-Mülheimer-Str. 129
51063 Köln-Mülheim

Incidentally, there will also be Introduction to Electronic Workshop at Dingfabrik the weekend before our workshop. We’re not associated with it, but it sounds fun.

Also, in case you’d like a similar workshop at your company christmas party or something, we are for sale!

const uint8_t kbd_manufacturerName[] = {
  0x22,                   //bLength: length of this descriptor in bytes (34)
  USB_DESC_STRING,        //bDescriptorType: string descriptor
  'P',0,'r',0,'e',0,'s',0,'s',0,' ',0,'A',0,'n',0,'y',0,' ',0,'K',0,'e',0,'y',0,' ',0,'U',0,'G',0 //bString[]: String (UTF16LE, not terminated)
};
Posted in USB.